
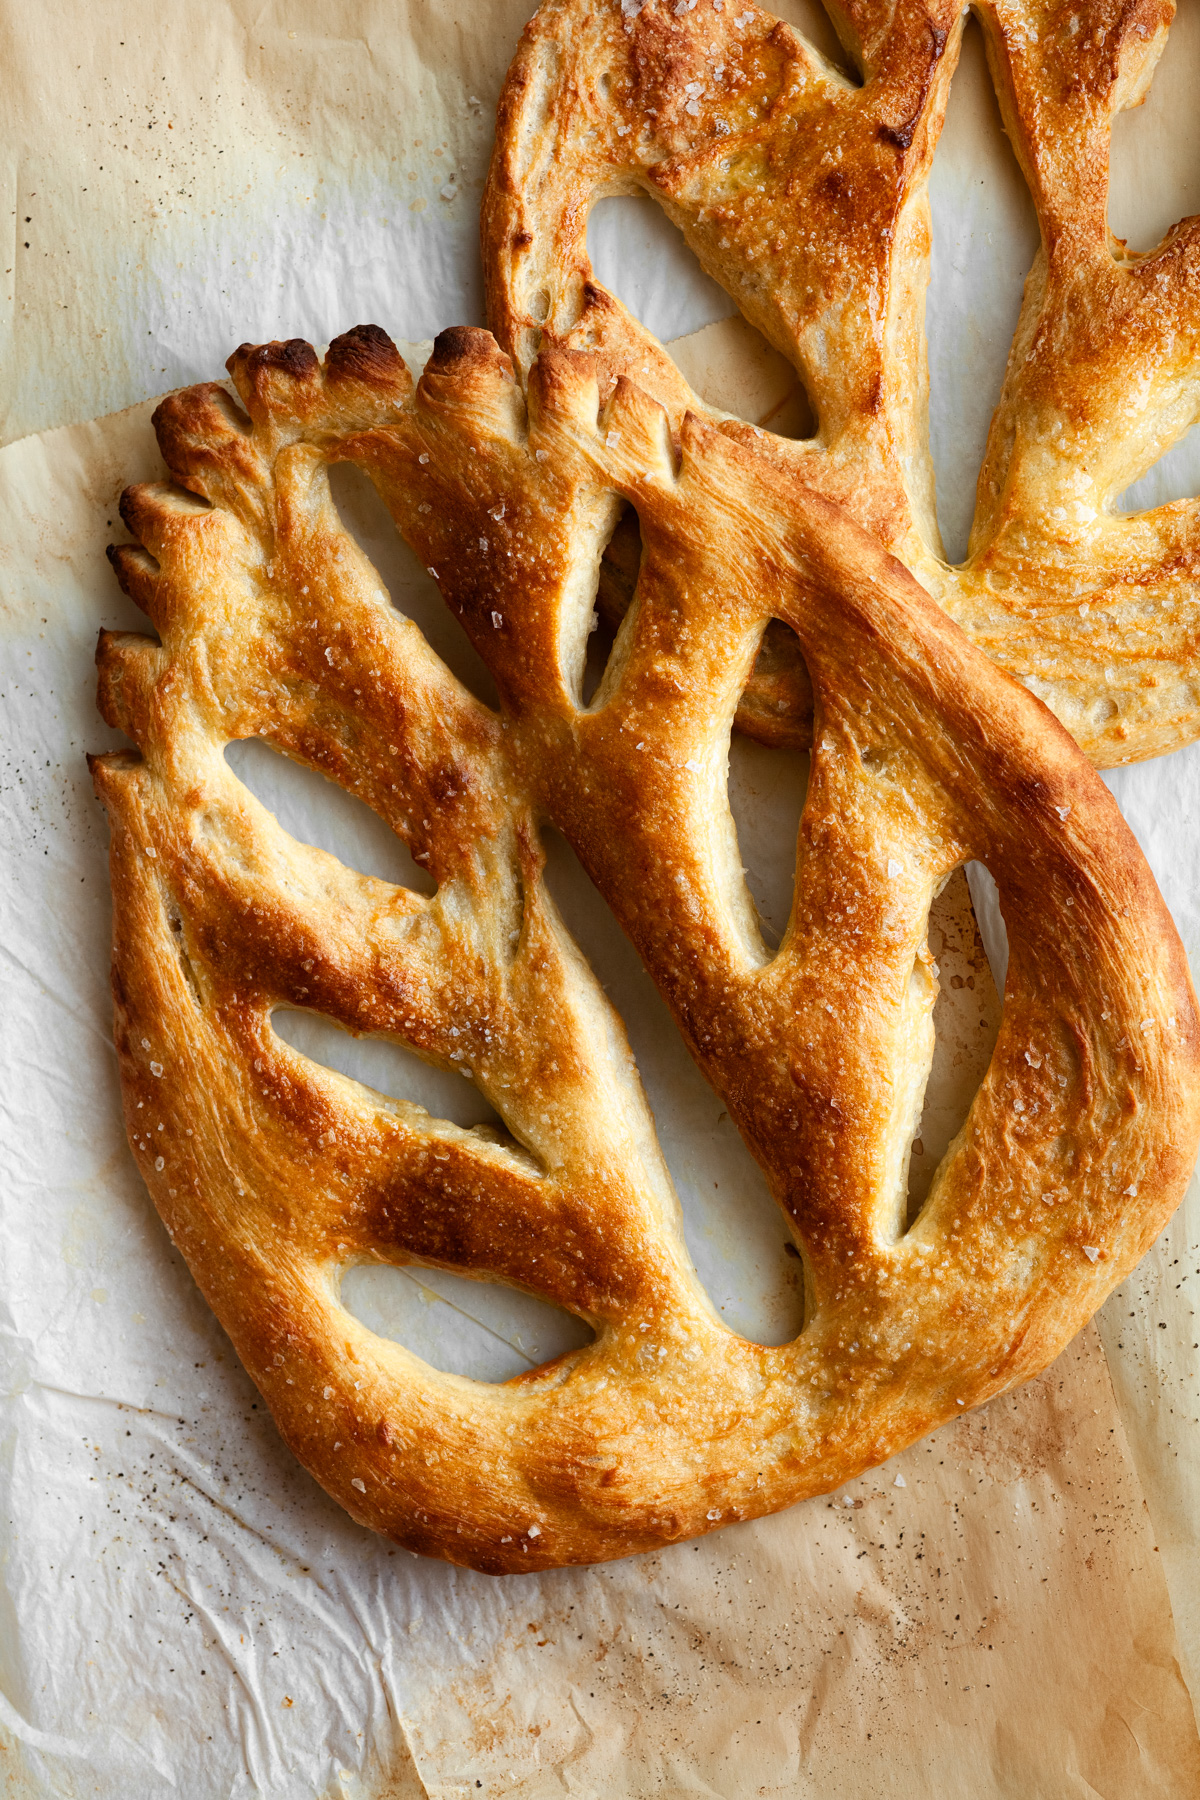
Fougasse (or "fogatza") is a rustic French flatbread from Provence and, while it looks elaborate, it's very easy to make at home. This fougasse bread recipe is made with the no-knead method which creates an ideal flavour and texture with less hands on time. Brushed with olive oil and coated in flaky sea salt, it's crisp on the outside, chewy and airy on the inside. A perfect bread for tearing and sharing. Makes two 14" fougasse, enough for a small crowd.
Yields 12 servings
Prep Time 35 minutes | Proofing Time 18 hours | Cook Time 20 minutes | Total Time 18 hours 55 minutes
Why this recipe works
Like many breads, fougasse can be made with a no-knead method. While kneading can be therapeutic, sometimes it's easier to simply mix ingredients together and let time look after the the rest. This is a basic homemade fougasse bread recipe, similar to my no knead garlic fougasse. However, this version makes two loaves and is flavoured simply with olive oil and sea salt.
Unlike other recipes, this version involves fewer steps. Along with no kneading, there is no preferment (sponge, poolish, or biga), and no second rise. I find some fougasse recipes a tad dry, so I developed this recipe to have a 77% hydration (water to flour percentage) which works really well. The result is a crispy, chewy and flavourful bread, with less work overall. The classic shape and pattern are simple to create but require a bit of persistence; my helpful tips for these steps are included below.
This bread is impressive, rustic and sure to delight everyone at the table. I hope you enjoy making my fougasse bread recipe in your own home!

Ingredients & Substitutions
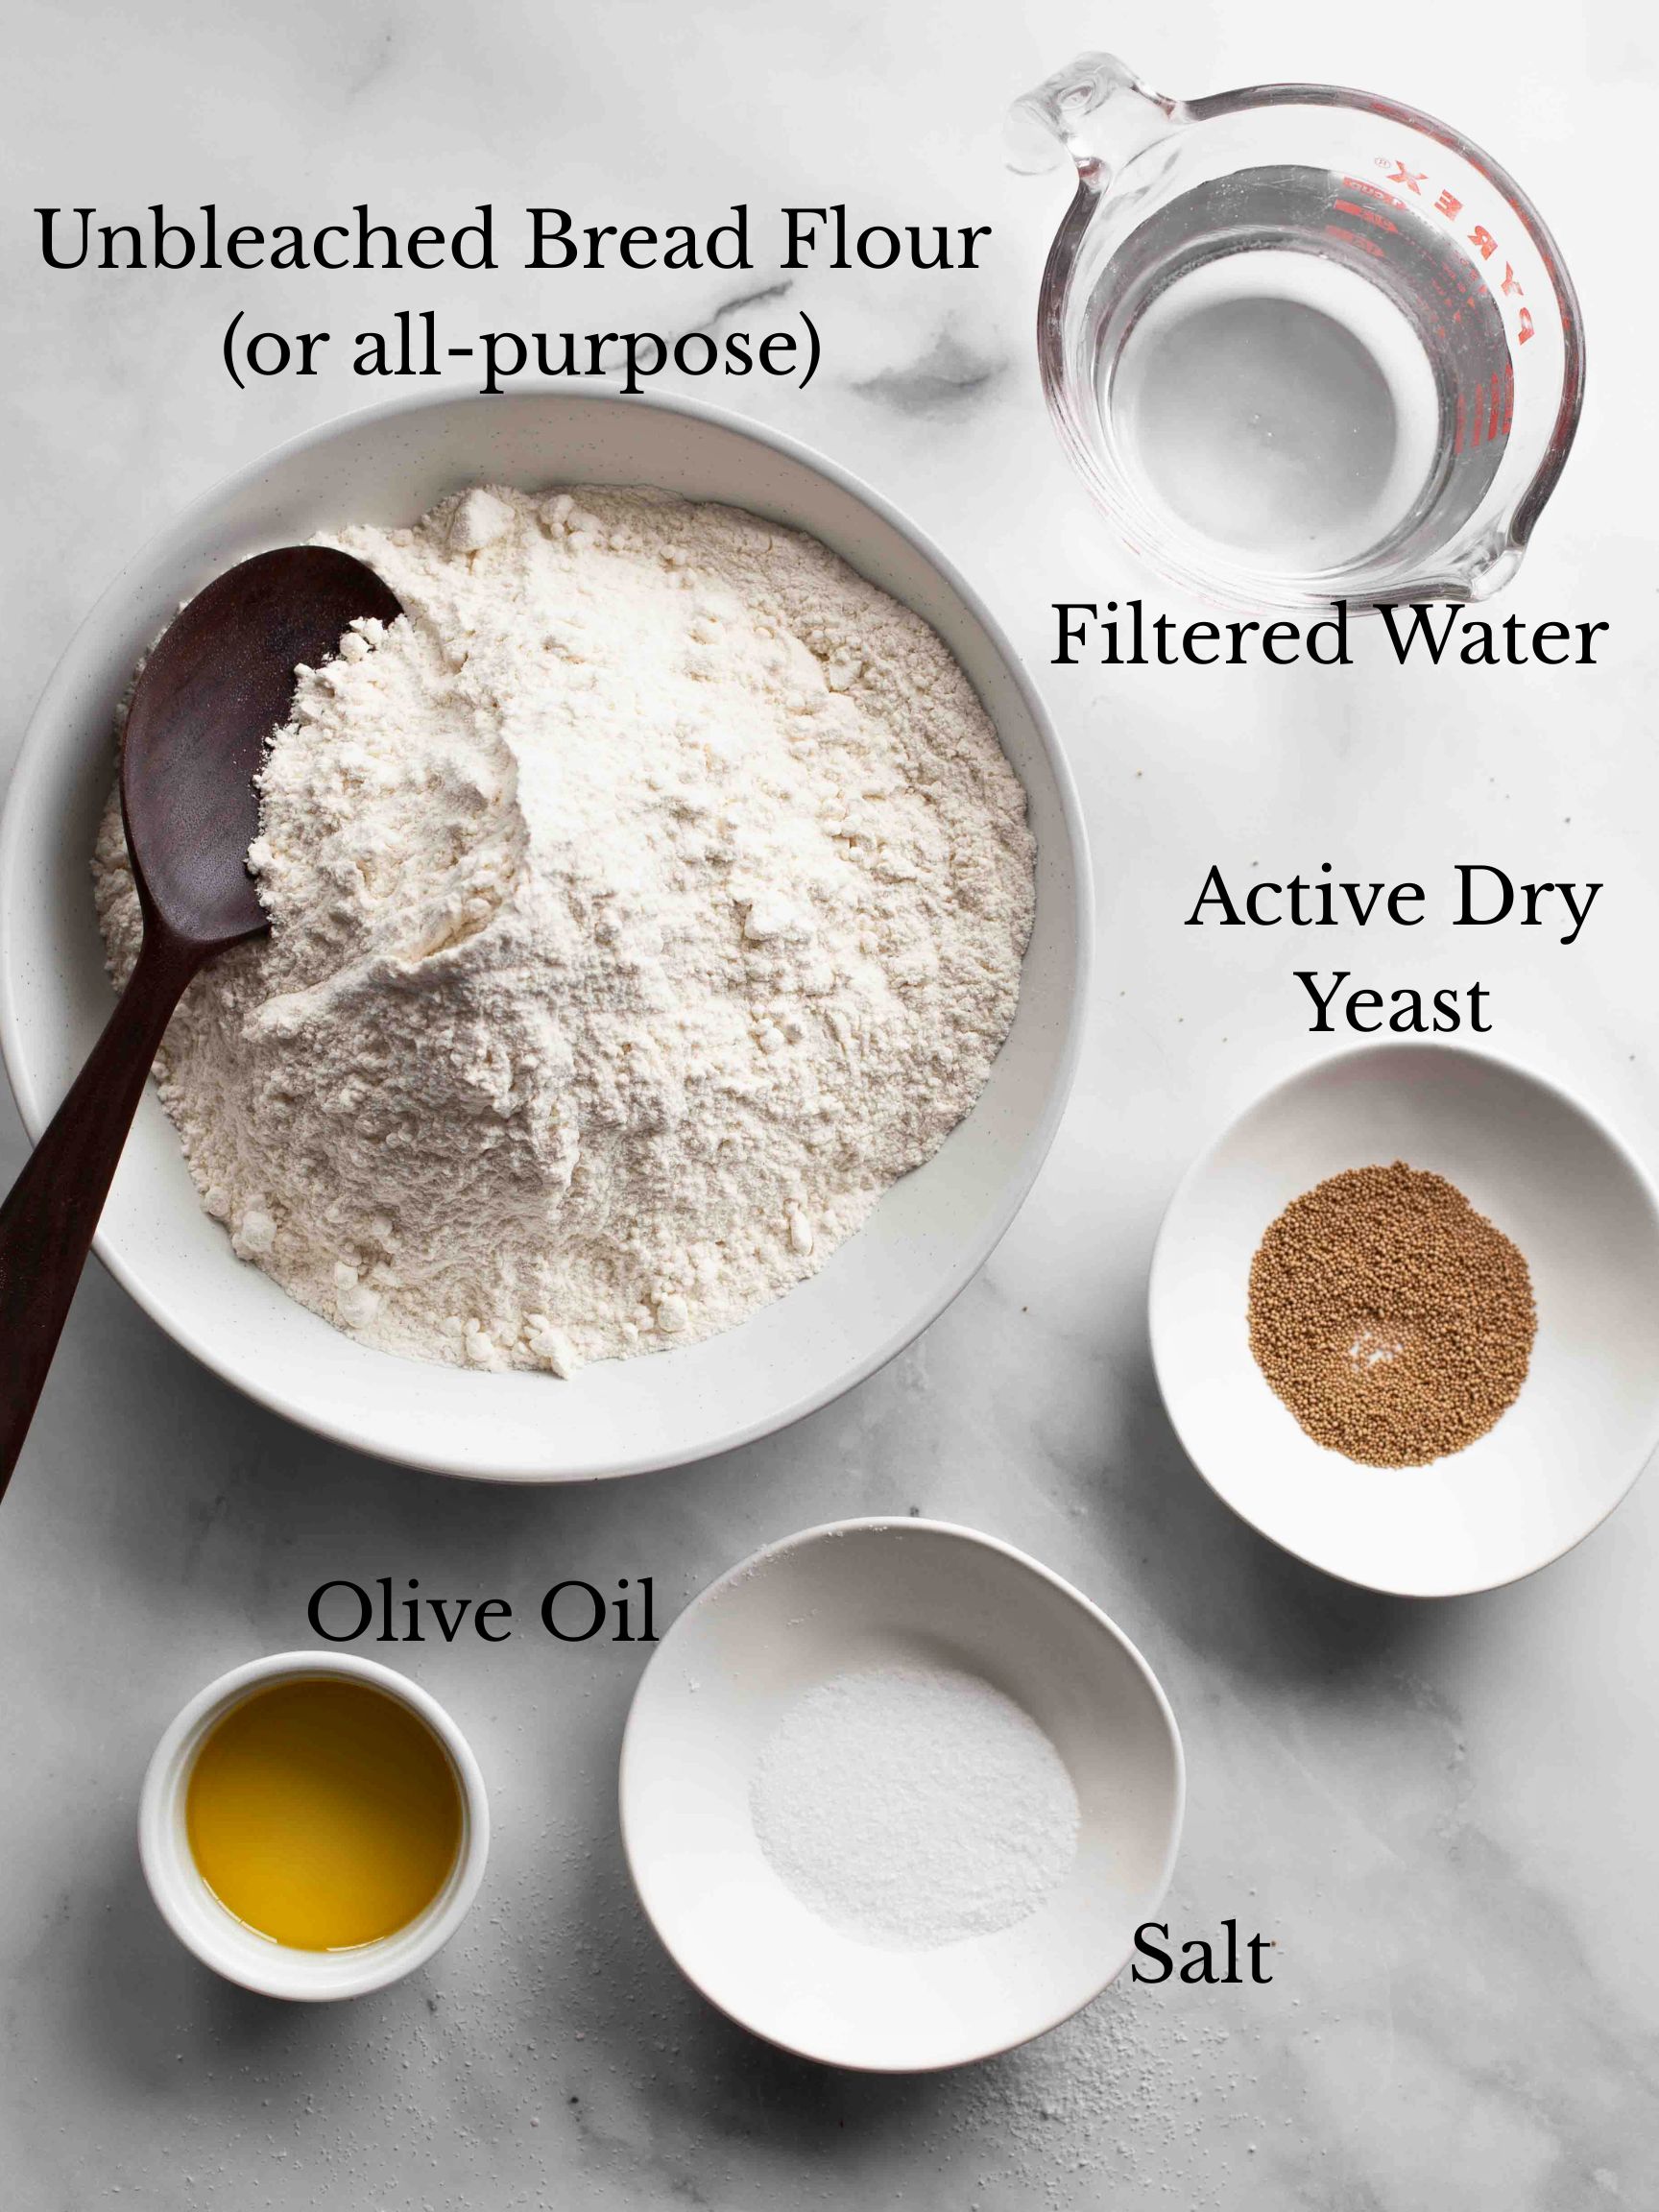
- Bread Flour: you can use all-purpose flour in equal measure, however, because bread flour has a higher gluten content (13-14% vs 12% for all-purpose) the dough will have more "spring" and chew once baked. You can also replace a portion of the bread flour with whole wheat flour (about ½ cup or 90g in total).
- NOTE for US residents: American all-purpose flour weighs less than Canadian all-purpose flour (120g vs ~150g per cup). As such, please use the gram measurements in the recipe card to make sure you are using the correct amount.
- Warm Filtered Water: the water should be 105-110°F or close to it. Warm water helps activate the yeast and starts the proofing process. Temperatures higher than 120°F will deactivate yeast.
- Active Dry Yeast: you can use instant yeast in equal measure. To substitute instant yeast, simply mix it into the flour with the salt and proceed with the recipe thereafter.
- Salt: kosher salt is my preference, however, you can use sea salt in equal measure.
- Olive Oil: I use extra virgin olive oil in the dough and for basting on top. Fougasse is also wonderful dipped in olive oil and balsamic.
- Optional Toppings: see below
Optional Flavourings & Toppings
Traditional fougasse is often flavoured with anchovies, olives, herbes de Provence, and or cheese. However, it can be kept simple with chunky sea salt and a slather of olive oil. This recipe is great as is, however, you can add any of the following to the dough or basted on top before baking:
- Herbes De Provence (1-2 teaspoon for topping)
- Dried rosemary, oregano or thyme (1-2 teaspoon for topping)
- Garlic powder or onion powder (1-2 tsp, plus more for topping)
- Grated Parmesan or Gruyère (¼ cup for topping)
- Roasted red peppers (½ cup in the dough)
- Sun dried tomatoes, soaked and drained (¼ cup in the dough)
- Diced olives (½ cup chopped or sliced in the dough)
- Chopped capers, drained (~3 tablespoon in the dough)
Word to the wise...don't add fresh garlic to your dough. With my garlic fougasse recipe, it took several attempts to learn that fresh garlic inactivates yeast. As such, use garlic powder in the dough or sprinkled on top before baking.
Related: No Knead Garlic Fougasse Bread
How to Make No-Knead Fougasse Bread
Here are the basic steps involved. Plan to mix the dough the evening before you need to serve it. For the full detailed instructions, please see the recipe card further down the post or use the Jump to Recipe button back at the top.
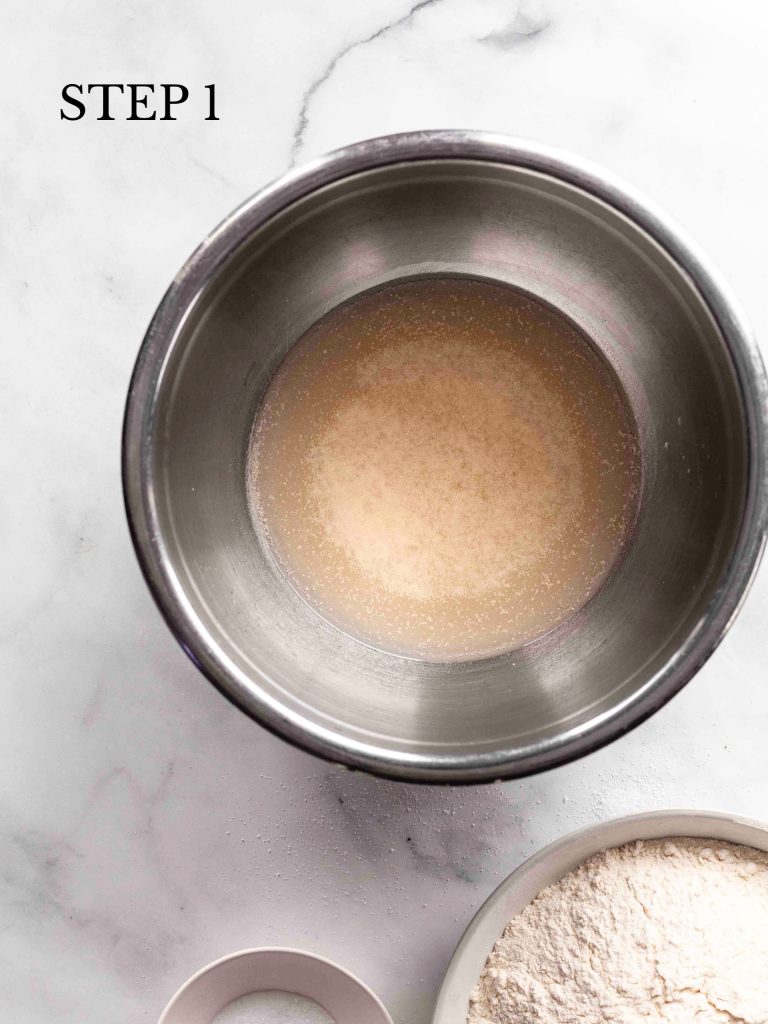


STEP 1: Combine the water and yeast and let stand until bubbly.
STEP 2: Add in the olive oil and stir to combine.
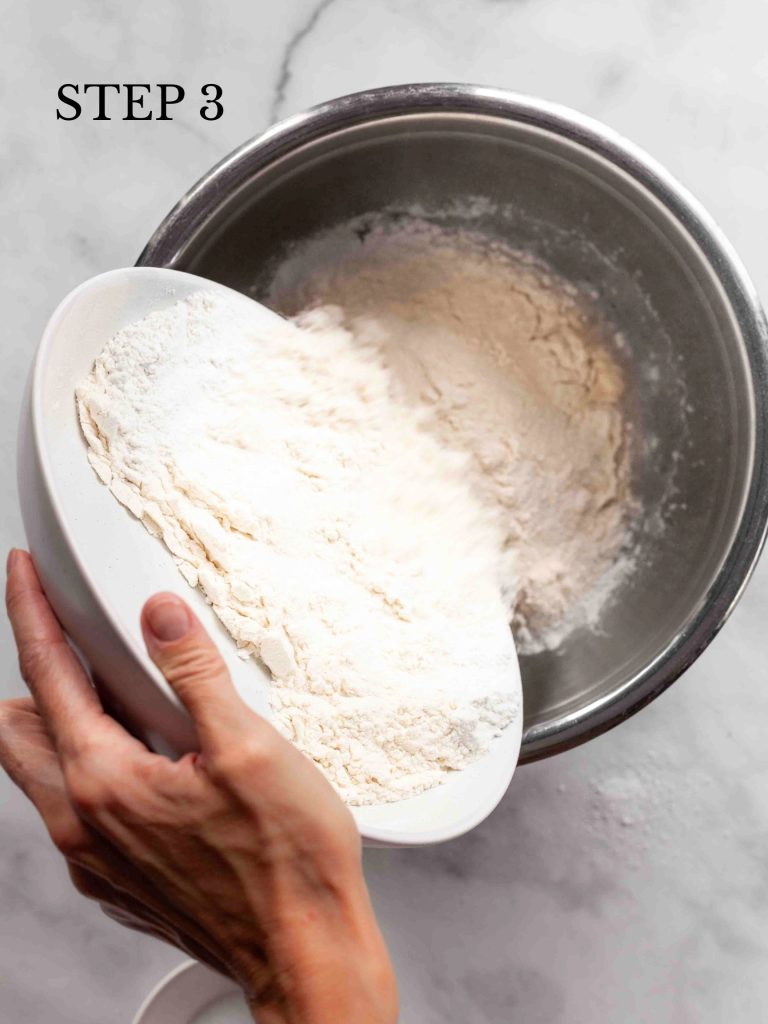
STEP 3: Add in the flour and salt.
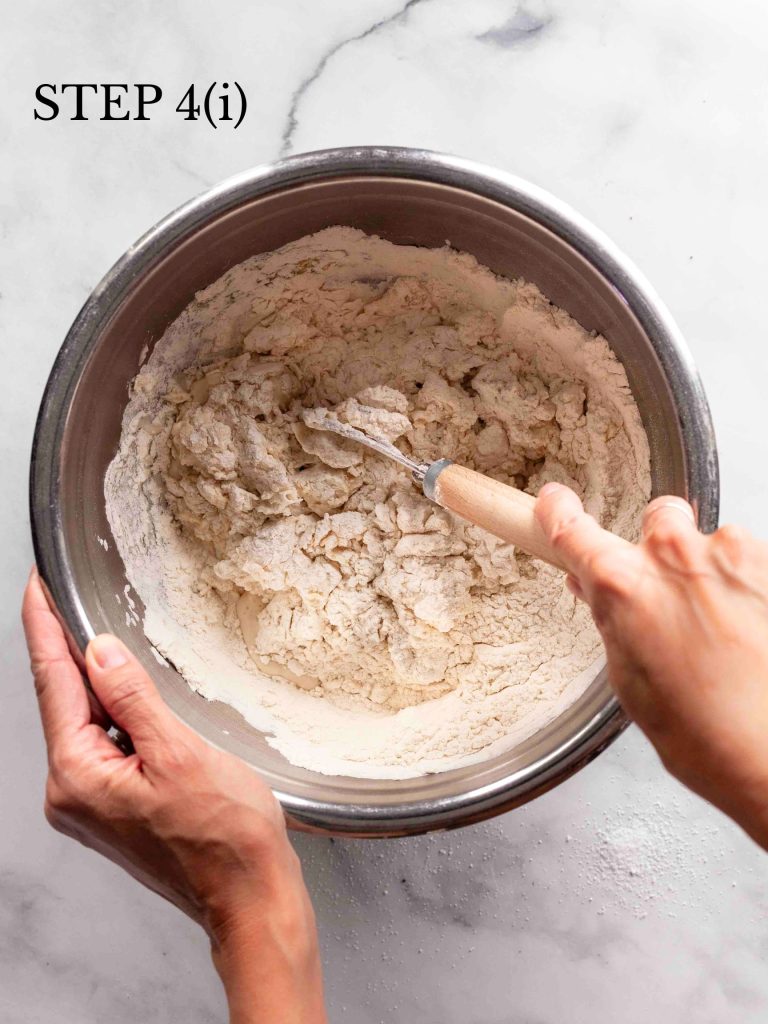
STEP 4: Mix until a rough dough ball forms and the flour is incorporated.



STEP 5: Evenly coat the top of the dough with a little olive oil.
STEP 6: Cover and place in the fridge to proof overnight.
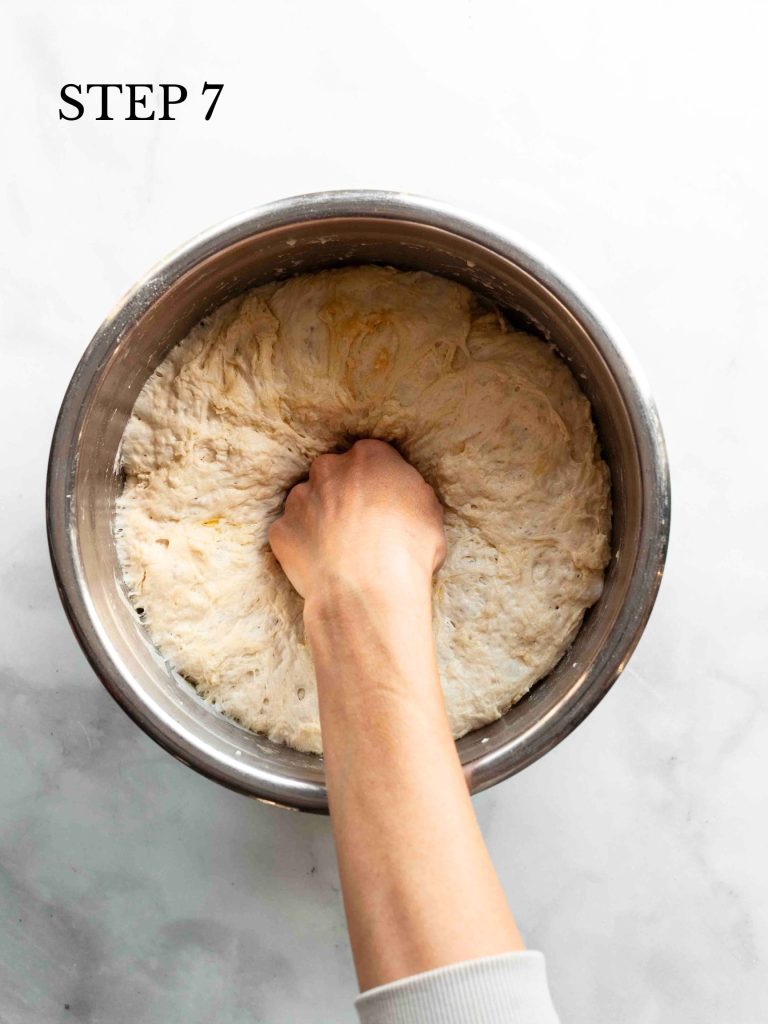
STEP 7: After the elapsed proofing time, preheat the oven and punch down the dough to release the air.
STEP 8: Form it into a ball and turn it onto itself a few times in the bowl.



STEP 9: Flour two large pieces of parchment paper. Divide the dough in half on a clean work surface and place the each half on it's own floured parchment paper.
STEP 10: Let the dough balls rest for 10 minutes.
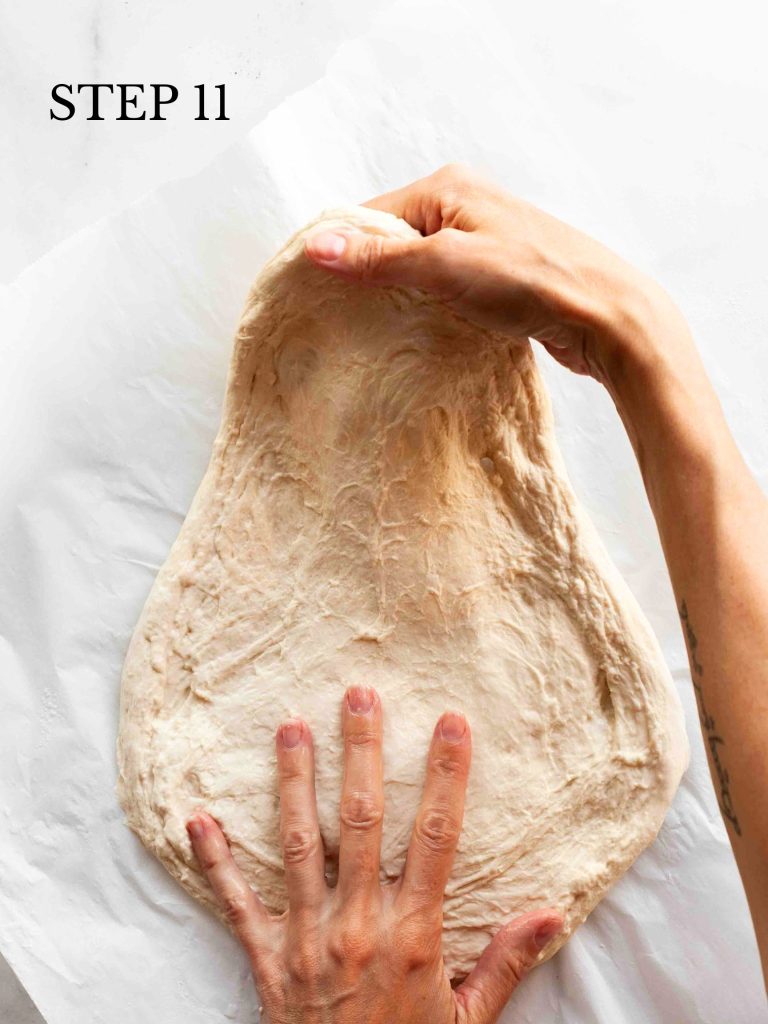
STEP 11: Lightly flour the top of the dough and, using your hands, form each into a tapered leaf shape about a ½" thick and ~12" long.
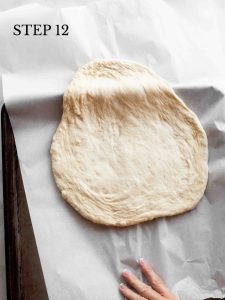
STEP 12: Slide each parchment paper and dough onto two large baking sheets (or do one at a time if you only have one sheet pan; the second dough will be fine while you finish the first).


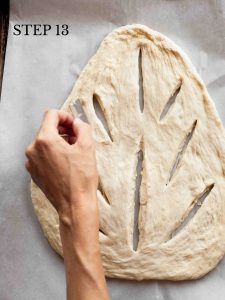
STEP 13: Cut the shaped dough with several lines to form a leaf vein pattern. Make sure to do this step on the baking sheet otherwise you may damage your counter top.
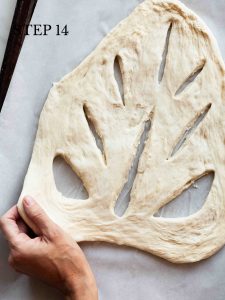
STEP 14: Tug at the edges of the dough to enlarge the cuts. Then gently reshape the dough into a more uniform appearance.
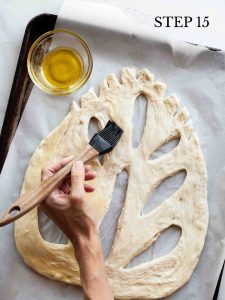
STEP 15: Baste the top with olive oil and sprinkle over the flaky salt. Bake in the preheated oven.
STEP 16: Transfer the baked fougasse to a wire rack, baste with more olive oil and cool. Repeat the patterning and baking steps for the second dough.
Expert Tips
- Plan Ahead: I make the dough the evening before I want to serve it. This is a two day process.
- Use Fresh Yeast: Active dry yeast is perishable with a usual shelf life of about 6 months once opened. You can test a small amount of yeast in warm water to check for activity before proceeding with the recipe.
- Use a Kitchen Scale: Flours weight will differ by country and region. Weighing ingredients is the only accurate way to make bread. The recipe card includes the gram measurements so please use them.
- Flour the Parchment: Otherwise, the dough will stick to the parchment and make shaping and scoring a headache.
- Rest the Dough: the dough will naturally resist shaping at first. Let it rest 5-10 minutes more and reshape as needed. NOTE: Once the cuts are made, shaping becomes much easier.
- Use a Sharp Knife: to get a clean cut, the knife needs to be sharp. Before making each cut, plunge the blade all the way through the dough so it touches the pan underneath. I use a bread lame and press the blade into the dough straight up and down like a cookie cutter, then gently slice through any remaining sticky dough strands.
- Slice Away from You: because the dough has tension, it's easier (and safer) if you cut away from you. Start with the base of the dough closest to you and pull the blade outwards towards the edge, turning the pan as needed to make the process easier for the remaining cuts.
- Reshape: once you widen the cuts, feel free to gently reshape the outer edges into a more uniform oval or leaf shape.
Storage & Make Ahead
Storage: Fougasse is best served the same day, shortly after it's made. You can store it in an airtight container or tightly wrapped at room temperature for 1-2 days, although the texture does change after storing.
Freezing: baked fougasse can be frozen whole or in portions. Wrap well in plastic wrap, place in a freezer safe bag and freeze; it should keep for up to 2 months this way.
Defrosting: move frozen fougasse to the fridge to thaw (this usually take 12 hours).
Reheating: place a the fougasse on a large baking sheet with a piece of aluminum foil over the top of the loaf to prevent over-browning. Place in a preheated oven at 300°F for 5-8 minutes or until warmed through.
For information on safe food handling and storage, please visit: the Government of Canada Food Safety website, USDA Food Safety Inspection Agency website or your country's official food safety website.

FAQs
Fougasse, originally known as "fogatza" or Provençal bread, is a delicious flatbread from the Provence region of France. This bread is made to be passed around the table for everyone to tear off a chunk with their meal.
Fougasse can be likened to Italian focaccia in its texture and flavour, although, it is generally thinner, has more of a crust on top and uses less olive oil. It also tend to be a lower hydration dough unlike some focaccias which can be upwards of 85%.
Traditionally, fougasse is shaped into a tapered leaf or sheaf of wheat. However, you can shape and pattern fougasse however you like.
The water should feel lukewarm or close to it. You should be able to comfortably leave your finger in the water for several seconds. If you need to pull your finger away quickly, the water is too hot for yeast as well. Warm water helps activate yeast and starts the proofing process, however, temperatures higher than 120°F will deactivate it.
You may be surprised to learn that flour weights vary by country because of the different strains of wheat grown. In Canada, a cup of all-purpose flour is closer to 150g versus 120g in the U.S. Please use a scale to make sure you are using the correct amount of flour listed in the recipe (600g).

Easy Homemade Fougasse Bread (Provençal Flatbread)
Special Equipment
- 1 or 2 large sheet pans
Ingredients
- 2 cups (460g) warm filtered water, (105-110°F)
- 2 teaspoon (8g) active dry yeast
- 2 tablespoon extra virgin olive oil, plus more for basting
- 4 cups (600g) unbleached bread flour**, or all purpose flour
- 2 teaspoon (8g) kosher salt
- flaky sea salt for topping
Instructions
Make & Proof the dough
- In a large bowl, combine the warm water and yeast and let stand until foamy (about 5-10 minutes). Add in the olive oil and stir to combine.
- In a medium bowl, combine the flour and salt. Add the flour to the yeast and water mixture and, using a dough whisk or wooden spoon, stir until a rough dough ball forms and the flour is fully incorporated.
- Evenly coat the top of the dough with a little olive oil, then cover and place in the fridge to proof overnight (minimum 12 hours and up to 18 hours).
Next Day: Shape the Dough
- Preheat the oven to 450°F. Remove the dough from the fridge and punch it down to release the air. Using clean hands or a rubber spatula, form the dough into a smooth ball by turning it onto itself a few times.
- Flour two large pieces of parchment paper and set aside. On a clean and lightly floured work surface, divide the dough in half and place each half on the prepared parchments (one per sheet). Let the dough balls rest for 10-15 minutes (this will assist with shaping)
- Working with one dough ball at a time, lightly flour the top and, using your hands or a floured rolling pin, form the dough into a tapered leaf shape about a ½" thick and ~12" long. The dough will naturally resist shaping, so be prepared to let it rest for an additional 5-10 minutes before reshaping. Once shaped, repeat with the second dough ball.
- Using the parchment paper, slide the shaped dough (and parchment) onto a large baking sheet. If you only have one large baking sheet, like myself, work with one dough at a time (the second dough is fine to rest while you finish baking the first).
Create the Pattern
- To create the pattern, make several deep cut lines in the dough as shown. Note: To make a clean cut, plunge the blade all the way through the dough before pulling the blade away from you towards the outer edge, rotating the pan as needed. Make sure to do this step on the baking sheet otherwise you may damage your counter top.
- The dough will naturally spread open along the cut lines, however, enlarge the cuts ~2-3 times more by using floured hands and tugging gently at the edges of the dough. Then gently reshape the outer edges into a more uniform shape.
Baste & Bake
- Baste the top with olive oil and sprinkle over the flaky salt. Bake in the preheated oven for 20-22 minutes or until golden brown on top.
- Transfer the baked fougasse to a wire rack to cool slightly before basting with additional olive oil. Repeat the above steps with the second dough. Fougasse is best served warm.
Heidi's Notes
Nutrition
This is an approximation of the nutrition offered in this recipe, and is created using a nutrition calculator. I am not a nutritionist and cannot guarantee accuracy. If your health depends on nutrition information, please calculate again with your preferred calculator.
Disclaimer
all recipes on The Simple Green are developed and tested in a Canadian kitchen, at normal elevation, using electric appliances and ingredients available in Canada. Results may vary.
More Bread Recipes
If you love my fougasse bread recipe, you may also like:


About Heidi Richter
Hi there! I'm Heidi, the professional recipe developer, food writer and photographer behind The Simple Green. Here you will find dozens of flavourful, approachable and well-tested recipes inspired by fresh seasonal ingredients you know and love.